Developing applications that integrate with the WhatsApp Business Platform offers incredible opportunities to engage with users. A core component of this integration is webhooks, which allow WhatsApp to send you real-time notifications about events, such as incoming messages. However, there's a significant hurdle for developers: WhatsApp requires a public HTTPS URL to send these notifications, but your development environment runs on localhost, which isn't accessible from the public internet.
This guide solves that exact problem. You'll learn how to securely expose your local development server to the internet to receive WhatsApp webhooks, enabling you to build and test your integration in a fast, efficient feedback loop. We'll use a simple Node.js and Express application as our webhook receiver and an open-source tool called Tunnelmole to create the necessary public URL.
By the end of this comprehensive guide, you will be able to:
- Understand the role and importance of WhatsApp webhooks.
- Build a basic webhook handler in Express.js to process WhatsApp notifications.
- Install and use Tunnelmole to get a secure, public HTTPS URL for your local server.
- Configure your Meta Developer App to send webhooks to your local environment.
- Test and debug your WhatsApp integration in real-time.
What are WhatsApp Webhooks?
WhatsApp Webhooks are automated messages sent from an application (in this case, WhatsApp) to your server when a specific event occurs. They are the backbone of building interactive and responsive applications on the WhatsApp Business Platform. Instead of you repeatedly asking the WhatsApp API if there's a new message (a process called polling), WhatsApp proactively tells you by sending an HTTP request to a "callback URL" that you provide.
These webhooks can notify you of various events, including:
- New Messages: When a user sends a message to your business number (text, images, audio, etc.).
- Message Status Changes: When a message you sent is delivered, read, or fails.
- Account Updates: Changes to your WhatsApp Business Account status.
- User Interactions: When a user clicks a button in one of your interactive messages.
To use webhooks, you need to set up a WhatsApp Business App through the Meta for Developers platform. During setup, WhatsApp will ask for a Callback URL. This URL must be a public, HTTPS-secured endpoint that WhatsApp's servers can reach. This is where the challenge of local development arises, and where a tunneling tool becomes essential.
Why You Need a Tunnel for Local Development
When you run a web server on your local machine, it typically listens on an address like http://localhost:3000 or http://127.0.0.1:3000. This address is only accessible from your own computer. For security reasons, your router and operating system firewall block incoming requests from the public internet to your localhost.
However, for a service like WhatsApp to send you a webhook, it needs to be able to make a POST request to your server from its own infrastructure out on the internet. It has no way of reaching localhost:3000 on your machine directly.
This is where a tunneling service comes in. A tunnel creates a secure connection from your local machine to a public server. It provides you with a publicly accessible URL (e.g., https://random-subdomain.tunnelmole.net) that forwards all incoming traffic through the secure tunnel to your local server.
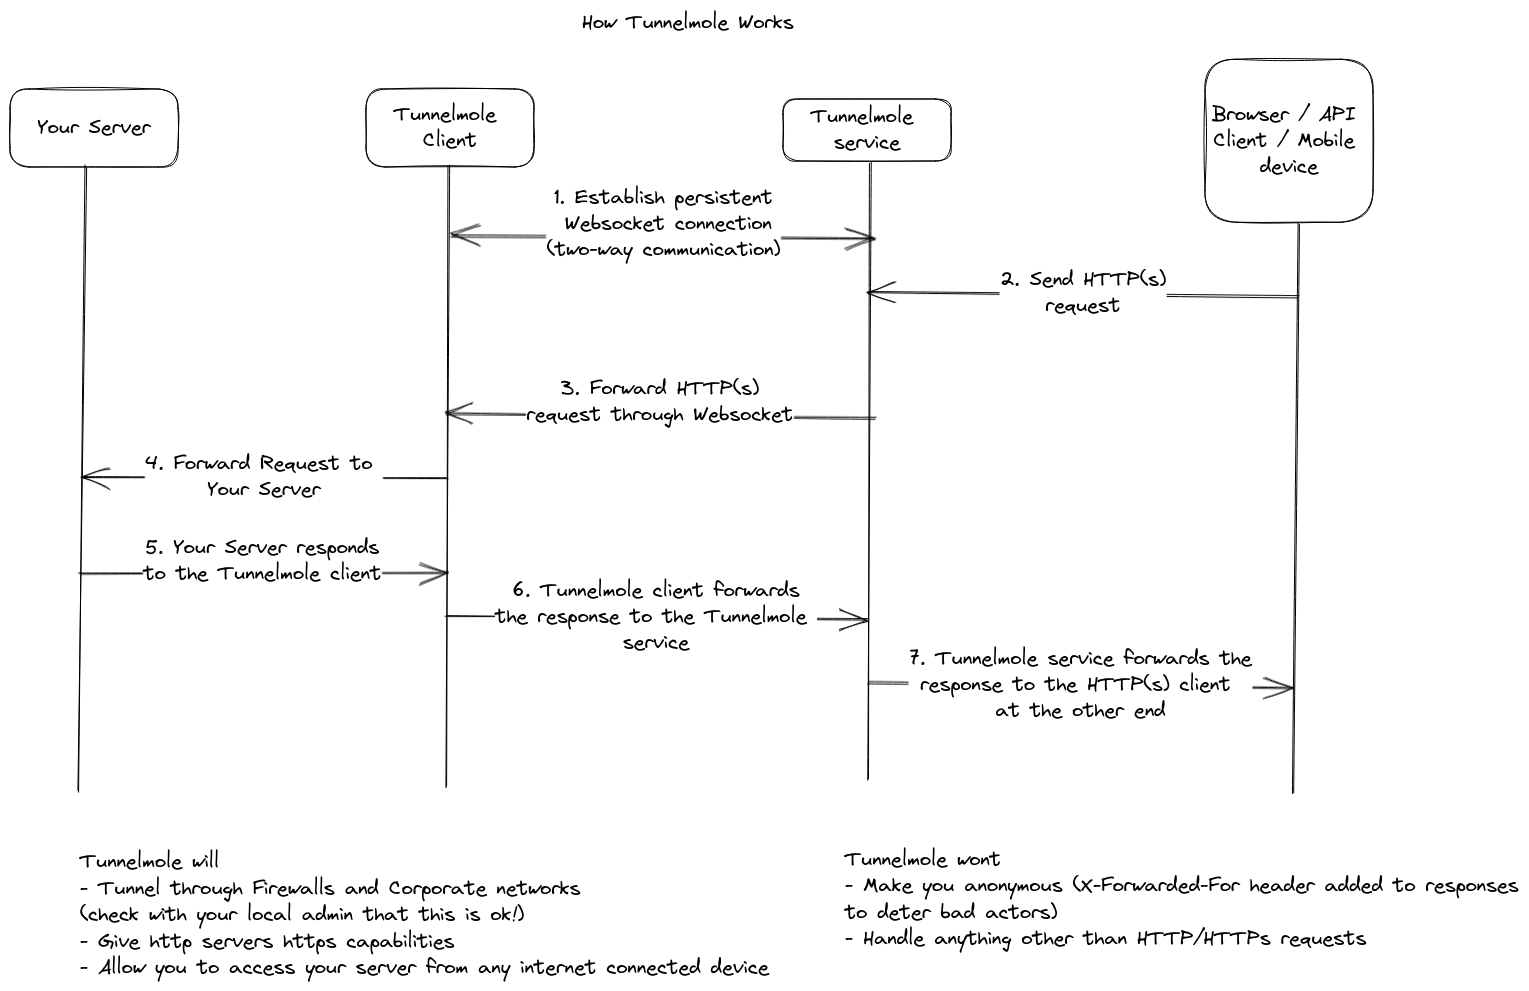
Using a tunnel allows you to:
- Receive Real Webhooks: Test your application with actual, live data from WhatsApp.
- Avoid Mocking: You don't need to create fake webhook payloads or stub requests, which can be inaccurate and time-consuming.
- Debug in Real-Time: Set breakpoints in your code and inspect the live request from WhatsApp as it hits your local machine.
- Accelerate Development: Get instant feedback on code changes without deploying to a staging or production server.
Introducing Tunnelmole: Your Open Source Tunneling Solution
Tunnelmole is a simple, fast, and open-source tool that gives your locally running servers a public URL. It’s designed to be straightforward, allowing you to get a tunnel up and running with a single command.
Key features of Tunnelmole that make it ideal for this task include:
- Open Source: The code for both the Tunnelmole client and server is publicly available on GitHub. This transparency allows you to inspect the code and understand exactly how it works.
- Free to Use: Tunnelmole's hosted service provides free public URLs that are perfect for development and testing.
- Optionally Self-Hostable: For advanced use cases, enhanced security, or custom domain needs, you can host the Tunnelmole service on your own infrastructure. This gives you complete control over your tunneling environment.
- Easy Installation: It's a native NodeJS application that can be installed via a simple script or NPM, with no complex dependencies.
Step-by-Step Guide: Testing WhatsApp Webhooks with Tunnelmole
Let's walk through the entire process from creating a local webhook handler to receiving a live notification from WhatsApp.
Prerequisites
- Node.js and npm: Ensure you have Node.js (version 16.10 or later) and npm installed.
- WhatsApp Business Account: You need access to the WhatsApp Business Platform. You can set this up through the Meta for Developers portal.
- A Test Phone Number: You'll need a personal WhatsApp number to send a message to your business test number.
Step 1: Create a Simple Express.js Webhook Receiver
First, let's create a small Node.js server using the Express framework. This server will have two endpoints required by WhatsApp:
- A
GETendpoint for the initial verification handshake. - A
POSTendpoint to receive the actual webhook data.
Create a new project folder, cd into it, and initialize a Node.js project.
mkdir whatsapp-webhook-test
cd whatsapp-webhook-test
npm init -y
npm install express body-parser
Now, create a file named index.js and add the following code:
/*
A simple Express.js server to handle WhatsApp webhook verification and notifications.
*/
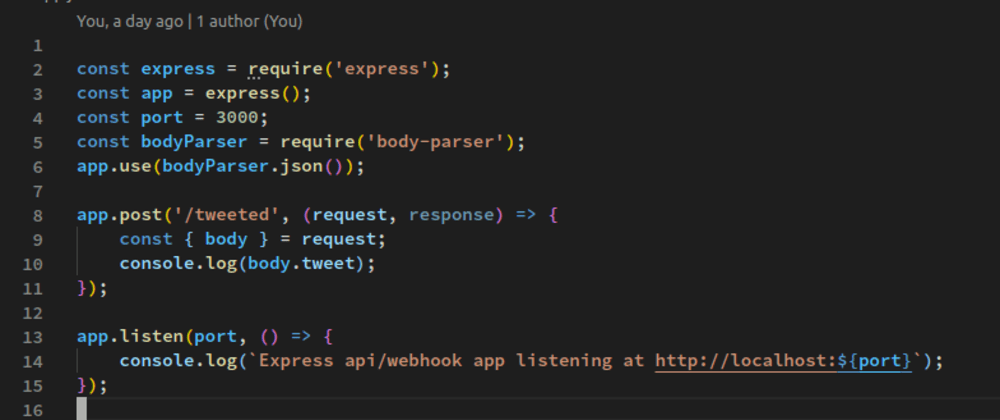
const express = require('express');
const bodyParser = require('body-parser');
const app = express();
app.use(bodyParser.json());
const PORT = process.env.PORT || 3000;
// This is the verification token you'll set in the Meta Developer App dashboard.
// It's a secret that you and WhatsApp both know.
const VERIFY_TOKEN = "YOUR_SECRET_VERIFICATION_TOKEN";
// Endpoint for WhatsApp to verify your webhook
app.get('/webhook', (req, res) => {
console.log("Received a verification request.");
// Parse the query params
const mode = req.query['hub.mode'];
const token = req.query['hub.verify_token'];
const challenge = req.query['hub.challenge'];
// Checks if a token and mode is in the query string of the request
if (mode && token) {
// Checks the mode and token sent are correct
if (mode === 'subscribe' && token === VERIFY_TOKEN) {
// Responds with the challenge token from the request
console.log('WEBHOOK_VERIFIED');
res.status(200).send(challenge);
} else {
// Responds with '403 Forbidden' if verify tokens do not match
console.error("Verification failed. Tokens do not match.");
res.sendStatus(403);
}
} else {
res.sendStatus(400); // Bad Request if mode or token is missing
}
});
// Endpoint for receiving webhook notifications
app.post('/webhook', (req, res) => {
console.log("Received a webhook notification.");
const { body } = req;
// Log the entire payload to inspect it
console.log(JSON.stringify(body, null, 2));
// You can now process the webhook payload.
// For example, check if it's a message notification:
if (body.object === 'whatsapp_business_account') {
body.entry.forEach(entry => {
entry.changes.forEach(change => {
if (change.field === 'messages') {
const message = change.value.messages[0];
console.log(`New message from ${message.from}: ${message.text.body}`);
// Here you would add your logic to reply or process the message.
}
});
});
}
// Respond with a 200 OK to acknowledge receipt of the event
res.sendStatus(200);
});
app.listen(PORT, () => console.log(`Webhook server is listening on port ${PORT}`));
Remember to replace "YOUR_SECRET_VERIFICATION_TOKEN" with a unique, secret string of your own.
Run your server:
node index.js
Your server is now running locally and listening on port 3000.
Step 2: Install and Run Tunnelmole
With your local server running, the next step is to give it a public URL.
Install Tunnelmole by running the following command in your terminal. This script will detect your OS and install the correct version.
curl -O https://install.tunnelmole.com/xD345/install && sudo bash install
For Windows, you can download the executable directly and place it in your PATH.
Now, run Tunnelmole and point it to the port your Express app is using (3000).
tmole 3000
Tunnelmole will start and display your public URLs.
$ tmole 3000
Your Tunnelmole Public URLs are below and are accessible internet wide. Always use HTTPs for the best security

https://k8sctb-ip-1-2-3-4.tunnelmole.net ⟶ http://localhost:3000
http://k8sctb-ip-1-2-3-4.tunnelmole.net ⟶ http://localhost:3000
Copy the HTTPS URL (e.g., https://k8sctb-ip-1-2-3-4.tunnelmole.net). This is the URL you will give to WhatsApp.
Step 3: Configure Your WhatsApp Webhook
- Go to the Meta for Developers dashboard.
- Select the app you created for WhatsApp Business.
- From the sidebar, navigate to WhatsApp > Configuration.
- In the "Webhooks" section, click Edit.
- A dialog box will appear. Here you need to enter the Callback URL and Verification Token.
- Callback URL: Paste your Tunnelmole HTTPS URL here, and append
/webhookto the end (e.g.,https://k8sctb-ip-1-2-3-4.tunnelmole.net/webhook). - Verify Token: Enter the exact same secret token you defined as
VERIFY_TOKENin yourindex.jsfile.
- Callback URL: Paste your Tunnelmole HTTPS URL here, and append
- Click Verify and save.
When you click "Verify and save", WhatsApp will send a GET request to your Tunnelmole URL. Tunnelmole forwards this to your local server. Your Express app will check the token, and if it matches, it will respond with the challenge code. You should see "WEBHOOK_VERIFIED" logged in your local server's console. If everything is correct, the dialog will close, and your webhook will be active.
Step 4: Subscribe to Webhook Fields
After successful verification, you need to tell WhatsApp which events you want to be notified about.
- Back on the WhatsApp > Configuration page, find your webhook and click Manage.
- This will bring up a list of all available webhook "fields."
- Find the
messagesfield and click Subscribe. This tells WhatsApp to notify you about all message-related events.
Step 5: Test the Integration
Now for the exciting part! Let's test the end-to-end flow.
- From your personal WhatsApp account, send a message to the test number associated with your WhatsApp Business App.
- Watch the console where your local Node.js server is running.
You should immediately see the full webhook payload logged to your console, similar to this:
{
  "object": "whatsapp_business_account",
  "entry": [
    {
      "id": "123456789012345",
      "changes": [
        {
          "value": {
            "messaging_product": "whatsapp",
            "metadata": {
              "display_phone_number": "16505551111",
              "phone_number_id": "987654321098765"
            },
            "contacts": [
              {
                "profile": {
                  "name": "Your Name"
                },
                "wa_id": "14155552671"
              }
            ],
            "messages": [
              {
                "from": "14155552671",
                "id": "wamid.HBgLMTQxNTU1NTI2NzEVAgARGBJDNzI4Q0Q4MTQ0N0JBRTdGRDAA",
                "timestamp": "1668631112",
                "text": {
                  "body": "Hello from my phone!"
                },
                "type": "text"
              }
            ]
          },
          "field": "messages"
        }
      ]
    }
  ]
}
You will also see the specific log message: New message from 14155552671: Hello from my phone!.
Congratulations! You are now receiving live WhatsApp webhooks on your local machine. You can now set breakpoints in your index.js file, modify the code, and test your logic in real-time without ever needing to deploy your changes.
Security and Best Practices
When moving to production, always validate the request signature. WhatsApp signs each webhook request with your app's secret key using HMAC-SHA256. This is sent in the X-Hub-Signature-256 HTTP header. Verifying this signature ensures that the request genuinely came from WhatsApp and was not tampered with. This step is crucial for securing your production webhook endpoint.
Conclusion
Testing webhooks is a common pain point in modern API development. For services like the WhatsApp Business Platform, a public callback URL is non-negotiable, which often forces developers into slow, cumbersome deployment cycles just to test a small change.
By using Tunnelmole, you can bridge the gap between your local development environment and the public internet. This guide has shown you how to set up a Node.js server, generate a public HTTPS URL with a single command, and configure WhatsApp to send live webhook events directly to your laptop. This workflow dramatically speeds up development, improves debugging, and ultimately helps you build more reliable integrations faster.
Because Tunnelmole is open source and can be self-hosted, it offers a flexible and powerful solution that scales with your needs, from a quick test to a permanent development tool.
Download Tunnelmole and start building your next WhatsApp integration today with a faster, more efficient development loop.