Introduction
As a Node.js developer, finding efficient ways to write high-quality code is an ongoing part of the craft. There are only so many hours in a day that you can dedicate to coding. The landscape of tools and best practices is constantly evolving, and staying productive means keeping your workflow sharp and efficient. These six productivity tips will supercharge your development process, saving you hours of valuable time that you can reinvest in building better applications, learning new skills, or simply enjoying other activities.
This is not an exhaustive list, but mastering these techniques will give you a significant edge. It took me years to discover and internalize all of them, but you can learn them all in a single afternoon. Whether you're a junior developer or a seasoned engineer, integrating these practices will drastically improve your productivity.
Many Senior or higher level devs are already doing many of the techniques below. But they're worth learning at any stage and even a beginner can pick them up easily.
1. Master the Fuzzy Finder in Your IDE
In modern software development, we often work with large, complex codebases, sometimes containing thousands of files. How do you quickly locate a specific file like employee.js, buried deep within a directory structure such as /src/features/authentication/userTypes/employee.js hidden amongst thousands of other files? Manually navigating the directory tree is slow and inefficient, and interrupting a colleague for directions isn't always the best approach.
The solution is the fuzzy finder, a powerful IDE feature that lets you find files quickly.
In VS Code, simply press Ctrl+P (or Cmd+P on Mac) and start typing the name of the file you're looking for. The results appear as you type, intelligently matching your query even if you only type parts of the filename or path.
If you're using a JetBrains IDE like WebStorm or IntelliJ IDEA, press Shift twice quickly (Double Shift) to bring up a similar "Search Everywhere" dialog, which can find files, classes, symbols, and more.
Adopting the fuzzy finder is a small change that yields massive time savings, eliminating minutes of fruitless searching every single day.
2. Use a Real Debugger Instead of console.log()
One of the most significant leaps in my journey as a developer was learning to use a real debugger. It transformed my ability to fix bugs and build complex features, often turning a day's worth of work into a couple of hours. Debugging is especially invaluable when you're navigating an unfamiliar codebase. You can trace complex logic, inspect the state of your application at any point, and understand convoluted code without having to guess.
If you've ever found yourself littering your code with console.log() statements, you know how tedious it can be. You print one value, then another, adding more and more statements until your console is a mess. It's like trying to find your way in the dark with a tiny flashlight. Your working memory can only hold so much information, and soon you're scrolling back and forth, trying to piece the puzzle together.
Enter the debugger. By setting a "breakpoint" in your code and running your application in debug mode, the program execution will pause at that exact line. From there, your IDE will show you all the variables in the current scope, the call stack, and more.
With a single breakpoint, you get a complete snapshot of your application's state, eliminating the need to juggle multiple console.log() outputs mentally. Debuggers can do more – pressing "Step Over" a few or more times runs your code line by line. "Step Into" steps into a function call, letting you trace the execution of your code seamlessly.
As you become more advanced, you can even debug the internal code of frameworks like Express. This unlocks a deeper level of understanding that documentation alone can't provide. To get started with setting up the debugger in VS Code for a Node.js application, check the official documentation or one of the many excellent guides available online.
3. Embrace async/await and Banish "Callback Hell"
Node.js is built around asynchronous operations, which can be tricky to manage. In the early days, this led to a pattern infamously known as "Callback Hell" or the "Pyramid of Doom."
Consider this pre-async/await example:
// The old way: Callback Hell
function addFavoriteProduct(userId, favoriteProduct) {
    userRepository.get(userId, (err, user) => {
        if (err) {
            // Handle error
            return;
        }
        profileRepository.get(user.profileId, (err, userProfile) => {
            if (err) {
                // Handle error
                return;
            }
            productsRepository.getFavoriteProducts(userProfile.favoriteProductsId, (err, favoriteProducts) => {
                if (err) {
                    // Handle error
                    return;
                }
                favoriteProducts.add(favoriteProduct);
            });
        });
    });
}
This code is deeply nested, difficult to read, and prone to errors. Each new asynchronous step adds another layer of indentation, making the control flow hard to follow.
Fortunately, modern JavaScript (since Node.js v8) offers a much cleaner syntax: async/await.
// The modern way: async/await
async function addFavoriteProduct(userId, favoriteProduct) {
    try {
        const user = await userRepository.get(userId);
        const userProfile = await profileRepository.get(user.profileId);
        const favoriteProducts = await productsRepository.getFavoriteProducts(userProfile.favoriteProductsId);
        await favoriteProducts.add(favoriteProduct);
    } catch (error) {
        // Handle all errors in one place
        console.error("Failed to add favorite product:", error);
    }
}
This revised code is flat, linear, and reads almost like synchronous code. It's vastly easier to understand, maintain, and debug. If you encounter older tutorials or codebases using the callback pattern, make it a priority to refactor them to use async/await.
4. Share Your Work Quickly with a Public URL
Did you know you can get a public, shareable URL for a Node.js application running on localhost? Even if you're behind a corporate firewall or a complex network, you can expose your local server to the internet in seconds with an open-source tunneling tool like Tunnelmole.
This capability is a game-changer for collaboration. You can:
- Get fast feedback: Share your work-in-progress with product managers, designers, or clients without a full deployment.
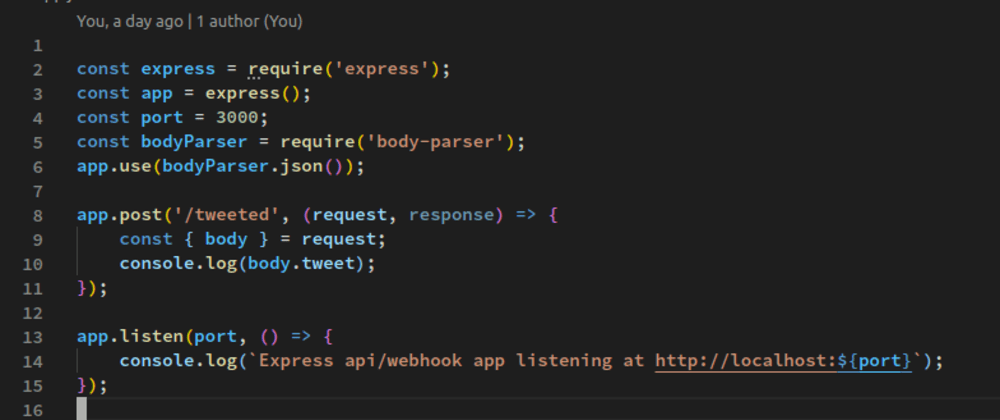
- Debug live integrations: Test webhooks from services like Stripe, Slack, or Shopify by giving them a real HTTPS endpoint that tunnels to your machine.
- Collaborate with frontend developers: Provide a live backend API for them to build against.
- Test on real devices: Easily access your local web app from your phone or other devices to test your site on mobile.
Tunnelmole is a free and open-source tool that makes this incredibly simple.
First, install Tunnelmole. If you have Node.js installed, the easiest way is with npm:
sudo npm install -g tunnelmole
Alternatively, you can use the one-line installer for Linux, Mac, or WSL:
curl -O https://install.tunnelmole.com/xD345/install && sudo bash install
Once installed, if your local Node.js app is running on port 3000, just run:
tmole 3000
Tunnelmole will give you a unique public URL that forwards all traffic to your local server.
$ tmole 3000
Your Tunnelmole Public URLs are below and are accessible internet wide.

https://cqcu2t-ip-49-185-26-79.tunnelmole.net ⟶ http://localhost:3000
http://cqcu2t-ip-49-185-26-79.tunnelmole.net ⟶ http://localhost:3000
Now you can share this URL with anyone, anywhere. For more advanced use cases, like custom subdomains, you can check out the Tunnelmole documentation.
5. Automate Repetitive Tasks with npm Scripts
Every project has a set of routine tasks: compiling code, running tests, linting files, starting the server, etc. Instead of manually typing these commands and remembering all their flags, you can automate them using npm scripts in your package.json file.
{
  "name": "my-awesome-app",
  "version": "1.0.0",
  "main": "dist/app.js",
  "scripts": {
    "build": "tsc -p ./",
    "watch": "tsc -p ./ -w",
    "test": "jest --watch",
    "lint": "eslint . --ext .ts",
    "start": "node dist/app.js",
    "dev": "nodemon src/app.ts"
  },
  "dependencies": {
    "express": "^4.17.1"
  },
  "devDependencies": {
    "typescript": "^4.5.0",
    "jest": "^27.4.0",
    "eslint": "^8.3.0",
    "nodemon": "^2.0.15",
    "ts-node": "^10.4.0"
  }
}
In this example (for a TypeScript project):
npm run buildcompiles the TypeScript code into JavaScript.npm run watchdoes the same but watches for changes and recompiles automatically.npm testruns the Jest test suite.npm run lintchecks the code for style and syntax errors with ESLint.npm startruns the compiled application.npm run devusesnodemonto run the app in development mode with auto-restarts.
By defining these scripts, you create a consistent, single-command workflow for yourself and anyone else who works on the project. start and test are special scripts that can be run without the run keyword (i.e., npm start, npm test).
6. Get Fast Feedback with nodemon
When you make a change to your code while the server is running with node app.js, you have to manually stop it (Ctrl+C) and then restart it to see the effects. This cycle might only take five seconds, but if you do it hundreds of times a day, those seconds add up to hours of wasted time over a week.
nodemon solves this problem elegantly. It's a utility that wraps your Node application and automatically restarts it whenever it detects file changes in the directory.
First, install it globally or as a dev dependency:
npm install -g nodemon
or
npm install --save-dev nodemon
Then, instead of node app.js, you run:
nodemon app.js
Now, every time you save a file, nodemon will automatically restart your server, creating a seamless and rapid feedback loop.
$ nodemon src/app.ts
[nodemon] 2.0.15
[nodemon] to restart at any time, enter `rs`
[nodemon] watching path(s): *.*
[nodemon] watching extensions: ts,json
[nodemon] starting `ts-node src/app.ts`
Server listening on http://localhost:3000

# (I save a file here)

[nodemon] restarting due to changes...
[nodemon] starting `ts-node src/app.ts`
Server listening on http://localhost:3000
Pro-tip: Integrate nodemon into your dev script in package.json as shown in the previous section for a powerful development workflow.
Conclusion
Productivity isn't about working harder; it's about working smarter. By incorporating these six techniques—the fuzzy finder, a real debugger, async/await, tunnelmole, npm scripts, and nodemon—into your daily Node.js development practice, you can eliminate friction, reduce cognitive load, and save a significant amount of time.
These simple adjustments can have a profound impact on your efficiency and job satisfaction. If you found this article useful, please consider sharing it with your colleagues and on social media to help others boost their productivity too.
Happy Coding!